 Free shipping over $75 CAD


Cacao-Infused Honey Benefits & Recipes for a Gourmet Treat
Cacao-Infused Honey: Benefits, Recipes, and What's in the Jar
TL;DR: Curious about cacao-infused honey benefits and recipes? Cacao and cocoa aren't quite the same thing, and how the cacao is processed changes how many flavanol antioxidants survive. Our organic cacao-infused honey isn't Dutch-processed, which is why people love it so.
Cacao. Cocoa. Chocolate. Most people use these words like they're interchangeable, and most of the time, nobody notices. But if you're holding a jar of OneRoot's Organic Cacao-Infused Honey and wondering what makes it different from the "chocolate honey" on the shelf next to it, it’s more than the name.
Here's what cacao and cocoa really mean, how we make ours differently from most competitors, what current research supports, and several easy ways to put it to use.
Cacao or Cocoa? Clearing Up the Confusion
Both words trace back to the same tree, Theobroma cacao. The difference is in how the beans are processed.
-
Cacao refers to the bean in its least processed form: fermented, dried, then ground into nibs or powder without high heat or chemical treatment.
-
Cocoa means the bean has gone through further processing: often roasted, sometimes treated with an alkalizing agent to soften the flavour and darken the colour. This is known as Dutch processing.
Dutch processing is the main reason why one jar of "cacao honey" might taste and behave nothing like another.
Why Dutch-Processed Cocoa Loses Its Punch
Alkalization strips out a large share of the antioxidant compounds that make cacao worth reaching for in the first place. A 2008 study measured flavanol levels across a range of commercial cocoa powders.
-
Natural, non-alkalized cacao averaged 34.6 milligrams of flavanols per gram.
-
Heavily alkalized, Dutch-processed cocoa averaged just 3.9 milligrams per gram, a drop of roughly 89%.
-
Light and medium alkalization landed somewhere in between.
As you can see, the more a cacao powder is chemically treated, the less of its original antioxidant content survives.
Most commercial "cacao honey" or "chocolate honey" products don't say whether their cocoa is Dutch-processed. Given how common alkalized cocoa is in mainstream baking and food manufacturing, it's a safe bet that a fair number of them are.
The cacao OneRoot uses doesn't go through that process. We only use Peruvian cacao. It’s
-
Hand-selected
-
Fermented for three to four days
-
Sun-dried
-
Then crushed and winnowed into powder
-
No alkalization at any point
That's a real, checkable difference, and it's a stronger claim than a generic "rich in antioxidants."
Cacao-Infused Honey Benefits: What the Research Shows
Cacao's reputation for health benefits isn't invented, but it does need some context.
A study covered by the Harvard Health Blog gave 90 healthy adults, ages 61 to 85, one of three daily doses of cocoa flavanols for eight weeks. The participants received either a low dose (48 mg), a medium dose (520 mg), or a high dose (993 mg). The medium and high dose groups showed measurable improvements in attention, executive function, and memory. The low-dose group didn't.
The bigger trial is COSMOS, a Harvard-led study of over 21,000 adults aged 60 and older. It found that a daily cocoa extract supplement providing 500 milligrams of flavanols reduced cardiovascular disease deaths by 27% over the study period.
But before you stock up on chocolate, that's not, by the lead researcher's own account, a green light to eat more chocolate. The COSMOS supplement delivered a concentrated, measured flavanol dose you won't get from food alone. The researchers were also explicit that the findings don't translate into a dietary recommendation.
So, where does that leave a spoonful of cacao honey?
It’s nowhere near a clinical trial dose, and it’s nowhere close to a proven cardiovascular treatment. What it does offer is real, non-alkalized cacao with its natural flavanol content intact, which is a meaningfully better starting point than most alternatives on the shelf.
Healthy Cacao-Infused Honey Recipes to Try
Once you know what's in the jar, the fun part is figuring out what to do with it. Here are five easy ways to start, the last two built around whole, simple ingredients if you want something closer to a health-forward breakfast than a treat.
Check out our recipe collection for more delicious dishes.
Five-Minute Cacao Honey Hot Chocolate
-
1 cup warm milk (dairy or plant-based)
-
1 to 2 tablespoons cacao-infused honey
-
A pinch of sea salt
Warm the milk gently on the stove or in the microwave. Stir in the honey and salt until fully dissolved. Taste and add more honey if you want it sweeter.
No-Bake Cacao Honey Energy Bites
-
1 cup rolled oats
-
1/2 cup nut butter
-
3 tablespoons cacao-infused honey
-
2 tablespoons chia seeds or ground flax
Mix everything in a bowl until it holds together. Roll into small balls and chill for at least 30 minutes before eating. They'll keep in the fridge for about a week.
Cacao Honey Banana Toast
-
1 slice whole grain toast
-
1/2 banana, sliced
-
1 tablespoon cacao-infused honey
-
A sprinkle of sea salt or cinnamon
Layer the banana over the toast, drizzle with honey, and finish with a light sprinkle of salt or cinnamon. Simple, and done in under two minutes.
Cacao Honey Overnight Oats
-
1/2 cup rolled oats
-
1/2 cup milk (dairy or plant-based)
-
1/4 cup plain Greek yogurt
-
1 tablespoon cacao-infused honey
-
1 tablespoon chia seeds
Stir everything together in a jar, cover, and refrigerate overnight. In the morning, you've got a fibre- and protein-rich breakfast with no added refined sugar, just the cacao honey doing the sweetening.
Cacao Honey Banana Smoothie
-
1 frozen banana
-
1 cup milk (dairy or plant-based)
-
1 tablespoon cacao-infused honey
-
1 tablespoon nut butter
-
A handful of spinach (you won't taste it)
Blend everything until smooth. It's a genuinely nutrient-dense way to get cacao's flavanols alongside potassium, fibre, and protein, not just sugar.
Taste Real Cacao
A lot of "cacao honey" on the market is vague about what's really in it. Ours isn't: single-origin Ecuadorian cacao, never Dutch-processed, blended into raw, single-source Boreal Forest wildflower honey. That’s it.
Shop Organic Cacao Infused Honey →
Common Questions About Cacao-Infused Honey
Does Cacao Honey Have Caffeine in It?
Yes, in small amounts. Cacao naturally contains a small amount of caffeine and a related compound called theobromine, though far less than a cup of coffee.
Is Cacao-Infused Honey the Same as Chocolate Honey?
Not necessarily. "Chocolate honey" often means cocoa powder, which may or may not be Dutch-processed, stirred into honey. Cacao-infused honey, done properly, uses less-processed cacao that keeps more of its natural flavanol content.
Can I Bake With Cacao Honey the Same Way as Regular Honey?
Yes. Swap it in at a 1:1 ratio in most recipes that call for honey, and expect a subtle chocolate note in the final result.
Is Cacao Honey Genuinely Healthy, or Just a Nicer Treat?
Both, in proportion. It carries genuine antioxidant content, especially since it's not Dutch-processed, but a spoonful isn't a substitute for the concentrated doses used in clinical research. Treat it as a better-for-you ingredient, not a supplement.
How Should I Store Cacao-Infused Honey?
Keep it sealed at room temperature, out of direct sunlight. No refrigeration needed.
Compare Our Full Infused Honey Collection
Cacao is just one way we infuse raw, single-source honey with real, traceable ingredients. If you're deciding between varieties, you want to add ours to your list.
Explore Our Infused Honey Collection →
Disclaimer: We love sharing our passion for wellness and nature's goodness. Please remember, the content on our blog is for general informational purposes. It should not be taken as medical advice. Always seek the guidance of your doctor or another qualified health provider with any questions you may have regarding a medical condition.

Ginseng Honey Benefits: What's in the Jar and Why It Matters
Ginseng Honey Benefits: What's Really Inside the Jar
TL;DR: Ginseng honey benefits come from two separate ingredients, not one. Honey brings well-documented antioxidant and antimicrobial properties. Ginseng has mild effects on immune function, blood sugar, and cholesterol. What's really inside the jar, whole root, powder, or extract? It might matter more than you realize.
Search "ginseng honey," and you'll find three different products labelled under the same name. Some brands mean honey that bees foraged from ginseng flowers. Others mean a small amount of ginseng extract stirred into a jar, sometimes as little as a fraction of a percent.
Neither is what you'll find in OneRoot's Organic Ginseng Infused Honey, which is raw wildflower honey blended with ground, whole Canadian ginseng root.
Here's what honey and ginseng do on their own, what we know about combining them, and how to tell what you're really buying.
What Honey Brings to the Jar
Honey's health reputation as a natural antioxidant and antimicrobial food is well established.
Ancient Egyptian physicians used it to dress wounds. Traditional Chinese Medicine and Ayurveda have both used honey as a base for herbal remedies and a remedy for sore throats and coughs for thousands of years.
Raw honey carries trace enzymes, pollen, and phenolic compounds that heavily processed honey loses along the way. That's the base every jar of infused honey starts from, ginseng or otherwise.
What Ginseng Contributes
Ginseng has been central to Traditional Chinese Medicine for over 2,000 years, where it's classified as a premier tonic herb. Traditionally, it’s been used to restore energy, support stamina, and aid recovery after illness. Korean traditional medicine holds a similar view of the root.
That long history is part of why ginseng carries such a strong reputation today. But what does current clinical research say?
A 2022 review looked at 20 studies, covering 1,295 participants, found that ginseng improved several cardiometabolic markers, including fasting blood glucose, total cholesterol, and inflammatory markers, in people with prediabetes and type 2 diabetes.
Immune function is another area supported by research. Ginsenosides, the active compounds in ginseng, show immune-modulating activity in lab studies and some human data. A 2024 review in Applied Biological Chemistry was careful to note that clinical efficacy in this area is still “controversial and sometimes contradictory." Although ginseng isn't a proven immune booster, it's a promising one.
Short-term use of ginseng (up to six months) seems safe for most healthy adults, but long-term use safety still needs more research. Experts don't recommend it for infants, children, or people who are pregnant or breastfeeding.
Honey (raw or pasteurized) must never be given to babies under 12 months old due to the risk of infant botulism. That rule applies before ginseng even enters the conversation.
Ginseng Honey Benefits: What Happens When You Combine Them?
Almost no research looks at ginseng-infused honey as a finished product.
However, what does exist is a 2012 rat study. During this project, rats received honey and Korean ginseng extract, either separately or together. Results of the combination showed protective effects against liver and kidney damage from a toxin challenge, measured through organ weight, glutathione levels, and tissue damage.
Although it's not a human wellness trial, it tells us honey and ginseng can interact biologically in a protective way. It doesn't tell you that a spoonful a day will protect your liver. Think carefully about products that claim otherwise.
How Ginseng Honey Is Usually Made vs. How OneRoot Makes It
Production is where a major differentiation shows.
A Chinese patent filing for ginseng-honey products describes the standard commercial method:
-
Fine powder, superfine powder, or extract
-
From ginseng root, stem, leaf, flower, or fruit
-
Mixed into honey at anywhere from 0.02% to 10% by weight
That's a wide range. Some commercial "ginseng honey" contains barely a trace of actual ginseng, and it doesn't have to come from the root at all.
OneRoot does it differently. Organically.
We start with premium Canadian ginseng roots that are 4+ years old, grown in Ontario without pesticides. We hand-pick and grind the roots in-house, then blend them into our raw organic wildflower honey. We don’t use powders or extracts from an unspecified source.
The jar also carries EcoCert Canada organic certification, which certifies it under the USDA, Canada Organic Regime (COR), and EU organic standards.
A short ingredient list and third-party organic certification are easier to verify than a vague health claim.
How to Use Ginseng Honey
-
Stir a spoonful into warm (not boiling) water or herbal tea
-
Drizzle over plain yogurt or oatmeal
-
Spread on toast in place of jam
-
Add to a post-dinner glass of warm water as a simple evening ritual
Try Raw Ginseng Honey for Yourself
Are you searching for honey but with something a little extra? We've built our full lineup of infused honeys to be single-source, traceable, and made with whole ingredients you can picture, not just read about on a label.
Shop Organic Ginseng Infused Honey →
Common Questions About Ginseng Honey Benefits
Is Ginseng Honey Safe to Take Every Day?
For most healthy adults, short-term daily use of ginseng in food appears safe based on current research. If you take medication or manage a chronic condition, check with your doctor first, since ginseng can interact with certain drugs.
What's the Difference Between Ginseng Honey and Honey Bees That Forage From Ginseng Flowers?
Bees rarely forage directly from ginseng flowers in any commercial way, so honey marketed that way is a different, less common claim. Our ginseng-infused honey means ginseng root is blended into finished honey after harvest.
Does Ginseng Honey Taste Bitter?
Ginseng root has a mild, earthy bitterness on its own. But when blended into raw wildflower honey, it comes through as a subtle background note rather than a dominant flavour.
How Should I Store Ginseng Honey?
Keep it in a sealed container at room temperature, away from direct sunlight. Refrigeration isn't necessary and can make it harder to spread.
Know What's in Your Jar
A health claim is easy to print on a label. A traceable, whole-root ginseng honey made in Canada from Canadian ginseng is harder to fake and easier to verify.
Disclaimer: We love sharing our passion for wellness and nature's goodness. Please remember, the content on our blog is for general informational purposes. It should not be taken as medical advice. Always seek the guidance of your doctor or another qualified health provider with any questions you may have regarding a medical condition.

Honey for Athletes: Fueling Energy and Recovery Naturally
How to Use Honey for Athletes' Energy and Recovery
TL;DR: Honey gives athletes the same fructose-glucose blend that powers most energy gels. But it doesn’t come with the long ingredient list. Eat a spoonful 15 to 30 minutes before training, sip diluted honey during long sprints, and add a little after. New research shows honey for athletes' energy and recovery goes further than fuel. It can ease muscle soreness too.
You're staring at a box of energy gels before a long run, wondering if the honey in your cupboard could do the same job for less money and a shorter ingredient list.
It can, but like most things in life, it’s not black and white.
Honey carries a natural blend of fructose and glucose, the same combination that makes most commercial gels work. However, heavy processing strips out the antioxidants and enzymes that come packaged with those sugars naturally. This is why OneRoot's honey stays raw and single-source, so nothing gets stripped out before it reaches you.
Here's how athletes can use honey to boost energy and recovery.
Honey for Athletes' Energy: When to Eat It Before, During, or After a Workout
Your gut absorbs glucose and fructose through two separate ways. Feed it both sugars at once, the way honey does naturally, and it can take in carbohydrate faster than a single-sugar source like glucose alone.
That's the reason sports nutrition companies create gels around a glucose-fructose blend. Honey just gets there first, and it's been doing it a lot longer.
A 2021 review in Sports Medicine and Health Science found that honey improved physical performance at moderate activity levels and lowered markers of fatigue and inflammation after strenuous exercise.
So what does that mean for your training week?
Before a Workout
Eat one to two tablespoons of raw honey 15 to 30 minutes before you start. Your body has time to convert it into usable energy without sitting heavy in your stomach.
During a Workout
For anything over 60 to 90 minutes, honey diluted in water works as a steady carbohydrate source. A 2025 study gave trained cyclists 90 grams of carbohydrates from honey per hour during three hours of steady cycling. They then did a capacity test. Honey performed similarly to a commercial sports nutrition product in all areas.
After a Workout
A small spoonful alongside some protein helps replace the glycogen your muscles just burned through.
None of this needs a stopwatch or a spreadsheet. You just need to know honey behaves differently depending on when you eat it.
How Honey Compares to Energy Gels
Honey doesn't beat energy gels. It matches them.
In the 2025 cycling study, honey wasn't some miracle upgrade. It performed on par with a purpose-built commercial product. But its performance came from a much shorter ingredient list: honey, water, and nothing else.
That's the real case for honey. Not "better than a gel," but "just as effective, and a whole food."
Does Honey Reduce Muscle Soreness After a Workout?
A 2024 randomized, placebo-controlled study gave 16 strength-trained women either a honey-sweetened drink or a placebo 90 minutes before an intense muscle-damaging workout.
The honey group reported less muscle soreness at every checkpoint afterward: immediately, at 12 hours, 24 hours, and 48 hours. Their strength and endurance also recovered faster, measured through wall-sit holds and leg press performance.
Part of the explanation may come down to antioxidants. A study in the Journal of Agricultural and Food Chemistry found that buckwheat honey raises the body's antioxidant capacity after just one serving, measured in the blood of 25 healthy men. More antioxidant activity gives your body extra tools to manage the oxidative stress that builds up during intense training.
So no, honey won't cancel out a brutal leg day. But the evidence suggests it's helping your body recover, not just giving it a sugar rush.
Buckwheat or Wildflower Honey: Which is Best for Exercise?
Both varieties give you the same core benefit: a fast-absorbing fructose-glucose blend your muscles can use as fuel. Where they split is antioxidant content.
Canadian Buckwheat Honey
Ours is naturally dark, straight from the hive. Buckwheat honey has a stronger taste than most. That darker colour also comes with a higher concentration of phenolic compounds, the antioxidants behind the recovery research mentioned earlier.
If soreness after hard sessions is your main concern, reach for buckwheat honey.
Boreal Forest Wildflower Honey
We also carry a milder wildflower option that's easier to use daily, whether that's stirred into water before an unwinding run or added to your morning oats. It carries the same base carbohydrate profile, just without buckwheat's extra antioxidant edge.
Neither one is the wrong choice. Pick wildflower for everyday energy, and keep buckwheat on hand for your harder sessions.
Try This: A Simple Honey Sports Drink
Mix two tablespoons of raw honey into 500 mL of water with a small pinch of salt. Sip it steadily through any workout longer than an hour. It has a similar fructose-to-glucose ratio as a commercial sports drink, but without the artificial colour or flavour.
Fuel Smarter With Real, Single-Source Honey
Most honey on grocery store shelves is a blend from several countries, heated and filtered until there's little left but sweetness.
OneRoot's honey is raw, single-source, and fully traceable back to Boreal Forest apiaries in Northern Ontario, Quebec, and Alberta. We test independently through third-party labs to confirm it's antibiotic-free and pesticide-free. 100% Canadian, from hive to bottle.
That’s important when honey is a training tool. You want to know what's in the jar before it fuels your next session.
CTA BUTTON: Shop Our Raw Honey Collection →
Common Questions About Honey for Athletes' Energy and Recovery
Can Honey Replace a Sports Drink Entirely?
For workouts under an hour, water is usually enough on its own. For longer efforts, honey diluted in water with a small pinch of salt covers the same carbohydrate and electrolyte bases as most commercial sports drinks.
Does Honey Cause a Sugar Crash During Exercise?
Sugar crashes usually happen with fast-digesting glucose on its own. Honey's fructose-glucose combination absorbs more steadily, which is part of why it works well as a mid-workout fuel rather than a spike-and-crash snack.
Is Raw Honey Safe to Eat Right Before a Race?
Yes, for healthy adults. If you're new to using honey around workouts, test it during a training run first rather than trying it for the first time on race day. That's the same advice that applies to any new fuel source.
Can I Use Any Honey for Exercise, or Does It Need to Be Raw?
Raw honey holds onto more of its natural enzymes and antioxidants than heavily processed, pasteurized honey. For exercise specifically, that difference is part of what the research measures.
How Should I Store Honey for Training and Race Day?
Keep it at room temperature in a sealed container. Honey doesn't need refrigeration, and cold temperatures speed up crystallization, which just makes it harder to squeeze into a water bottle before a race.
Ready to Make Honey Part of Your Training?
You don't need a cupboard full of gels and powders to fuel a workout. Sometimes the simplest option (one ingredient, fully traceable back to the hive) is also the one backed by research.
Disclaimer: We love sharing our passion for wellness and nature's goodness. Please remember, the content on our blog is for general informational purposes. It should not be taken as medical advice. Always seek the guidance of your doctor or another qualified health provider with any questions you may have regarding a medical condition.

How to Make Fermented Honey Drinks for Gut Health and Flavour
There’s something almost magical about taking a jar of golden honey, adding water and time, then watching it transform into a bubbling, complex elixir. Learning how to make fermented honey drinks connects us to an ancient human tradition. Tradition that dates back thousands of years to the Viking halls and Ethiopian feasts.
Fermentation is nature's way of preservation. It turns simple sugars into active cultures, alcohol, and acids that can boost gut health and tantalize the palate.
While it might seem intimidating to leave a jar of liquid on your counter for weeks, the process is actually quite simple. Best of all, you don't need a chemistry degree or expensive equipment. You just need patience, cleanliness, and high-quality ingredients.
What’s Happening in the Jar: the Science of the Bubble
When you look up how to make fermented honey drinks, you’re essentially looking up how to manage yeast.
Yeast is a microscopic fungus that lives practically everywhere, and it loves sugar. When yeast eats the natural sugars (glucose and fructose) in honey, it produces two main byproducts:
-
Carbon dioxide (bubbles)
-
Alcohol
If you let it go long enough, bacteria might take over and turn that alcohol into acetic acid (vinegar).
The key to successfully making fermented honey drinks is controlling this environment. You want to encourage the good yeast and keep out the bad bacteria. This is why using raw honey is so important.
OneRoot Raw Honey is unpasteurized, meaning it still contains natural wild yeasts and enzymes. Pasteurized honey from the grocery store is dead; the heat has killed the potential for life, making it much harder to get a good ferment going.
Why Honey is the Perfect Base
Honey is unique among sugars. It’s sweet, yes, but it also has a flavour profile that includes the flowers, soil, and season. When you learn how to make fermented honey drinks, you’ll find that different honeys produce vastly different results.
-
Boreal Forest Wildflower Honey creates a balanced, floral drink.
-
Buckwheat Honey produces a dark, robust, molasses-like flavour, perfect for heavy meads.
-
Wildflower Honey dissolves easily and offers a smooth texture for lighter drinks.
Using high-quality honey, like OneRoot, ensures that your final product doesn't just taste like alcohol or vinegar but like the Boreal Forest.
The Benefits of Fermented Honey Drinks
Why go through all this trouble? Because the result is a probiotic powerhouse.
When you understand how to make fermented drinks using raw honey, you’re preserving the enzymes and adding beneficial bacteria (lactobacillus) to your diet.
Store-bought sodas are full of high-fructose corn syrup. Your homemade honey drink contains antioxidants from the plants the bees visited, plus the gut-healing properties of fermentation.
Getting Started: Sterilization
The most critical rule in learning how to make fermented honey drinks is sterilization. You want to grow specific microbes, not random mould.
-
Wash everything. Use hot, soapy water for your jars, spoons, and airlocks.
-
Rinse well. Soap residue can kill your yeast.
-
Use glass. Plastic can scratch, harbouring bacteria. Glass jars are best.
-
Boil the water. Most Canadian municipal tap water contains chlorine or chloramine. These chemicals are designed specifically to kill bacteria and microbes. If you use straight tap water, the chlorine might kill the delicate wild yeast or the SCOBY. Either use filtered water or boiled and cooled water to remove the chlorine.
Recipes on How to Make Fermented Honey Drinks
The "Short Mead" Recipe (Simulated Sima)
Mead is the oldest alcoholic drink known to man. Traditional mead takes months or years to age. However, if you want to know how to make fermented honey drinks that you can drink quickly, try a "Short Mead" or a variation of Finnish Sima. This is low-alcohol and sparkling.
Ingredients
-
4 litres of filtered water
-
2 lemons (sliced)
-
1 cup of cooled strong tea
-
A pinch of brewing yeast (highly recommended for beginners) or a handful of organic raisins to introduce wild yeast.
Raisins are traditional when making Sima, but nowadays, they’re treated with oil or preservatives which can flop the fermentation. It’s best to add yeast.
Instructions
-
Boil half the water. Pour it into a sanitized bucket or large pot.
-
Stir in the honey until dissolved. (Do not boil the honey. It ruins the raw properties).
-
Add the remaining cold water to bring the temperature down.
-
Add the lemon slices.
-
When the liquid is lukewarm (not hot!), add your yeast, raisins, and tea.
-
Cover with a cloth and let it sit at room temperature for 24 to 48 hours until you see bubbles.
-
Strain into bottles with tight seals.
-
Refrigerate immediately. Consume within a week.
Note: This creates a carbonated, lightly alcoholic soda. Be careful when opening!
Jun Tea Recipe (The Champagne of Kombucha)
You’ve probably heard of Kombucha, which is fermented black tea and sugar. But if you want to know how to make fermented honey drinks, you should meet Jun. Jun is Kombucha’s cousin, but it feeds exclusively on green tea and raw honey.
Ingredients
-
1 litre of filtered water
-
2 bags of green tea
-
A Jun SCOBY (You can buy these online. Note: A regular Kombucha SCOBY can be trained to eat honey over time, but it takes patience.)
-
½ cup of starter liquid (previous Jun tea)
Instructions
-
Brew the green tea in the water. Remove the tea bags and let it cool to room temperature.
-
Stir in the raw honey. It must be cool, or you will kill the beneficial bacteria in the honey and the SCOBY.
-
Pour into a glass jar. Add the SCOBY and starter liquid.
-
Cover with a breathable cloth and secure with a rubber band (flies love fermenting honey!).
-
Let it sit for 3 to 5 days. Taste it daily. It should get tart and fizzy.
-
Bottle it and refrigerate.
Troubleshooting Common Issues
When learning how to make fermented honey drinks, you’ll likely make a few mistakes. That’s part of the fun.
No Bubbles
Your water might have been too hot and killed the yeast, or your room is too cold. Fermentation loves temperatures between 20°C and 25°C.
Too Sour
You let it ferment too long. It’s now vinegar. Don't throw it away; use it for salad dressing or marinades.
Exploding Bottles
This is a real risk. As yeast eats sugar, it releases gas. If you bottle it too early and leave it out of the fridge, the pressure builds up.
Always "burp" your bottles daily (open them slightly to release gas) or keep them in the fridge to slow fermentation.
Experimenting with Flavours
Once you master the basics, you can get creative.
-
Add ginger for a spicy kick (great for digestion).
-
Add berries (blueberries or raspberries) during the "second ferment" in the bottle for colour and flavour.
-
Use OneRoot Buckwheat Honey for a drink with deep, earthy notes that resemble a dark ale.
FAQs About Making Fermented Honey Drinks
Is it legal to make this at home?
Yes. In Canada, it’s legal to brew beer, wine, and mead for personal consumption. You just can’t sell it without a license.
How much alcohol is in these drinks?
It depends on the time and sugar. Short meads and Jun usually have very low alcohol (0.5% to 2%), similar to over-ripe fruit. Traditional mead can be as strong as wine (12-14%).
My honey is crystallized. Can I still use it?
Absolutely. Crystallization is natural. Just dissolve it in warm water. Making fermented honey drinks is a great way to use up the last sticky bits in a jar.
Can I use pasteurized honey?
You can, but it lacks the natural nutrients and wild yeast. The fermentation will be sluggish, and the flavour flat. Raw honey provides a more robust culture.
How do I know if it’s gone bad?
Trust your nose. It should smell yeasty, sour, or sweet. If it smells like rotting garbage or has fuzzy mould (black, green, or pink) growing on top, throw it out.
Do I need special equipment?
For simple recipes, no. A mason jar and a cloth are enough. If you want to make high-alcohol mead, you will need an airlock and a carboy, which you can find at any brewing supply store.
Brewing Nature's Gold
There’s a profound satisfaction in pouring a glass of sparkling, golden liquid that you made yourself. It tastes of patience and the wild Canadian landscape.
When you learn how to make fermented honey drinks, you’re finding new ways to experience the harvest of the Boreal Forest.
So, grab a jar of raw honey, some water, and start your own chemistry experiment today. The bees did the hard work; you just need to let nature take its course.
CTA: Get your organic, raw honey here.
Begin your brewing adventure.
Disclaimer: We love sharing our passion for wellness and nature's goodness. Please remember, the content on our blog is for general informational purposes. It should not be taken as medical advice. Always seek the guidance of your doctor or another qualified health provider with any questions you may have regarding a medical condition.

9 Honey Cheese Pairings to Impress Your Guests
It’s the finest bite. Imagine the creamy, salty richness of an artisan cheese, followed by the bright, floral sweetness of pure, unheated honey.
This is the pleasure of honey cheese pairings. It’s an easy way to turn a standard snack into a gourmet experience.
Best of all, you don’t need to be a professional chef to master this. You just need high-quality ingredients.
In Canada, we’re lucky. We have access to pristine lands that produce some of the finest honey on the planet. When you pair OneRoot’s single-source honey with high-quality cheese, you taste the 'terroir'—the unique flavour of the land itself.
Let’s not keep your palate waiting. Here’s how to create the ultimate cheese board using raw and infused honeys.
The Science of Sweet and Savoury
Why do these two foods work so well together? It’s all about balance.
While cheese brings the heavy richness of fat and salt, honey cuts through with necessary acidity and sweetness. It’s a beautiful contrast that wakes up your palate.
However, the quality of the honey matters. Most grocery store honey is pasteurized (heated), which destroys the natural enzymes and delicate floral aromas.
OneRoot’s pure honey is raw and unpasteurized. So, it retains the complex scent of the pristine Boreal Forest and its wildflowers. This adds a layer of depth to your cheese board that processed sugar syrups just cannot accomplish.
Now that you understand the chemistry of the pairing, let’s look at nine decadent combinations.
9 Top Honey Cheese Pairings from the Canadian North
Try our curated list. It’ll take you from classic combinations to bold, functional flavours.
1. The Canadian Classic: Boreal Wildflower & Aged Cheddar
Our Natural Raw Boreal Forest Wildflower Honey is a true taste of the North. Harvested from the pristine Canadian wilderness, it captures a rich and complex floral bouquet you can only get from such a diverse ecosystem.
This depth of flavour provides a smooth, creamy counterpoint to the sharp taste of an aged Canadian Cheddar. The honey mellows the cheese's bite without losing its own character.
2. The Bold Contrast: Buckwheat & Blue Cheese
Blue cheeses like Roquefort or Stilton are intense and salty. They need a honey with a strong personality.
Our Natural Raw Buckwheat Honey is dark, robust, and tastes of malt and molasses. It anchors the funkiness of the blue cheese, creating a savoury balance that’s deeply satisfying.
3. The Texture Play: Honeycomb & Camembert
For a conversational centrepiece, use Comb Honey (Honeycomb). Place a chunk of fresh honeycomb directly on top of a wheel of Brie or Camembert.
The edible beeswax adds a chewy texture that contrasts beautifully with the soft, creamy rind of the cheese. It’s raw honey in its most natural packaging.
4. The Modern Kick: Spicy Chilli Infused & Creamy Havarti
For those who love a little heat, our Spicy Chilli Infused Hot Honey is a palate-awakener.
The chilli infusion creates a 'swicy' (sweet and spicy) profile that cuts right through high-fat, creamy cheeses like Havarti or a mild Gouda. The heat lingers gently after the sweetness fades, making you crave another bite immediately.
5. The Fresh Bite: Organic Wildflower & Goat Cheese
Fresh goat cheese (chèvre) is tangy, earthy, and light. It requires a honey that’s sweet but mild. Our Organic Raw Wildflower Honey is the perfect match. It sweetens the tartness of the cheese without overpowering its delicate flavour.
This is a great pairing for spring or summer gatherings.
6. The Functional Luxury: Royal Jelly & Manchego
Honey with Royal Jelly is a power food. Royal Jelly adds a slightly tart, acidic profile to the honey.
This pairs exceptionally well with the nutty, buttery texture of a sheep’s milk cheese like Manchego. It tastes luxurious and provides a natural boost of nutrients.
7. The Earthy Balance: Ginseng Infused & Pecorino
Our Organic Ginseng Infused Honey brings a unique, earthy bitterness from Canadian ginseng. This creates a sophisticated pairing with a hard, salty cheese like Pecorino Romano.
The herbal notes of the ginseng complement the saltiness of the cheese in a surprising way.
8. The Cozy Comfort: Cinnamon Infused & Baked Brie
If you’re serving warm cheese, reach for the Organic Ceylon Cinnamon Infused Honey.
Bake a wheel of Brie until it’s gooey, then drizzle this warming honey over the top. The Ceylon cinnamon adds a festive, spicy aroma that is perfect for holiday entertaining.
9. The Dessert Board: Cacao Infused & Mascarpone
Who says cheese boards are only for appetizers? Mix Organic Cacao Infused Honey into a bowl of fresh Mascarpone or Ricotta. Now, spread it on a cracker or a slice of pear.
It tastes like a deconstructed cheesecake with a rich chocolate twist, but without the refined sugar.
When to Serve a Honey & Cheese Board
-
The 'Wine Down'. You don’t need a special occasion. A simple plate with one cheese and one jar of honey is the perfect way to end a busy week.
-
The Sunday Brunch. Move beyond jam and toast. Serve fresh honeycomb with croissants and a mild cheese for a luxurious start to the day.
-
The Dinner Party Starter. A board serves as a communal gathering point. It gets guests talking and eating immediately, without you being stuck in the kitchen.
-
The Outdoor Picnic. Hard cheeses and a jar of raw honey travel well. It’s an easy, mess-free way to upgrade your lunch in the park.
-
The Holiday Spread. Use our infused honey collection to add seasonal flavours like cinnamon or ginseng to your festive table.
Expert Tips for a Honey Tasting Event
If you’re hosting a tasting, keep these tips in mind to get the most out of your honey cheese pairings.
-
Temperature Matters. Take your cheese out of the fridge an hour before serving. Cold cheese mutes the flavours. You should also serve the honey at room temperature. Cold honey can mute the distinct aromatic flavours.
-
Texture Variety. A great board has a mix of textures. Include a soft cheese (Brie), a hard cheese (Cheddar), and a crumbly cheese (Blue).
-
Order of Operations. Arrange your board like a clock. Start with mild pairings (like Wildflower and Goat Cheese) and move clockwise toward the stronger ones (like Buckwheat or Hot Honey) so you don’t overwhelm your palate early on.
-
Drizzle, Don't Drown. A little goes a long way. You want to taste the cheese and the honey together, not just the sugar.
-
Palate Cleansers. Between bold pairings, eat a slice of apple, a plain cracker, or a few walnuts. This resets your taste buds so you can fully appreciate the next flavour.
Honey and Cheese Combo FAQs
Can you eat the wax in the honeycomb?
Yes, absolutely. The beeswax is 100% natural and edible. It adds a lovely texture to the bite and contains small amounts of vitamin A.
Does raw honey expire?
No. Honey is one of the only foods that never spoils. Bees create a perfect environment where bacteria can’t survive. If it creates crystals, that is just a sign of purity.
Just remember to keep it sealed in a cool (not cold) room.
Can I serve my crystallized honey on the cheese board?
Absolutely. Crystallization is a natural process for raw, unheated honey. It proves your honey hasn’t been over-processed. If you prefer it liquid, you can gently warm the jar in a bowl of warm water before serving.
Bring the Boreal Forest to Your Cheese Board
Building a cheese board is an art, but the ingredients should be simple. By choosing raw, organic honey from the Boreal Forest, you’re choosing purity and taste.
But even more importantly, you’re supporting a healthy bee population while treating your guests to the best flavours Canada has to offer.
Ready to impress your guests with these gourmet combinations?
Shop the full OneRoot Pantry here.
Disclaimer: We love sharing our passion for wellness and nature's goodness. Please remember, the content on our blog is for general informational purposes. It should not be taken as medical advice. Always seek the guidance of your doctor or another qualified health provider with any questions you may have regarding a medical condition.

Homemade Honey Cough Syrup: A Natural Remedy with Ginger, Lemon, and Oneroot Buckwheat Honey
When a scratchy throat or nagging cough starts to settle in, why not turn to something natural and homemade? This honey cough syrup combines three powerful ingredients — fresh ginger, lemon juice, and Oneroot’s Buckwheat Honey — into a smooth, soothing syrup that’s as effective as it is comforting.
Why These Ingredients Work
Buckwheat Honey: Dark, bold, and rich in flavor, buckwheat honey is known for its high antioxidant content and natural anti-inflammatory properties. Oneroot’s unpasteurized buckwheat honey is especially potent, providing a thick, molasses-like consistency that coats the throat and calms irritation.
Ginger: Known for its warming, stimulating effects, ginger is both anti-inflammatory and a natural decongestant. It helps open up airways and soothes the chest.
Lemon: Tangy and bright, lemon juice adds a burst of vitamin C and acts as a natural cleanser for the throat, cutting through mucus and freshening each dose.
Homemade Honey Cough Syrup Recipe
Ingredients:
-
1 cup water
-
2 tablespoons fresh ginger root (sliced or grated)
-
2 tablespoons fresh lemon juice
-
1/2 cup Oneroot Buckwheat Honey
Instructions:
-
Simmer the Ginger: Bring 1 cup of water to a boil, add the ginger, and simmer for 10–15 minutes. The longer you steep, the more concentrated the flavor and benefits.
-
Strain and Cool Slightly: Strain the ginger tea into a bowl or cup. Let it cool until it’s warm (not hot), to preserve the natural enzymes in the honey.
-
Stir in Lemon and Honey: Add the lemon juice and Oneroot buckwheat honey. Stir until fully blended.
-
Store: Pour into a clean glass jar and refrigerate. The syrup stays fresh for up to two weeks.
How to Use:
Take 1–2 teaspoons as needed for cough relief. You can also mix it into warm tea or water for a soothing, aromatic drink.
A Naturally Effective Solution
Crafting your own honey cough syrup is a refreshing alternative to store-bought remedies. With the distinct taste and benefits of Buckwheat Honey, this syrup transforms a simple home remedy into something deliciously therapeutic. It's clean and made with ingredients you can trust — no artificial additives, just the power of nature.
Note: Not suitable for children under one year old.

Honey and Tea: A Sweet Symphony of Therapeutic Benefits
Honey has been cherished for its numerous health benefits and therapeutic properties for centuries. One of the most delightful ways to harness these benefits is by pairing raw honey with tea.
Whether you enjoy a cup of green tea, black tea, herbal tea, or any other variety, adding a spoonful of raw honey can enhance your tea's flavour and therapeutic potential.
In this blog, we will explore the various health benefits of raw honey and how combining it with tea can offer sweet relief for your overall well-being.
The Magic of Raw Honey
Raw honey is the natural, unprocessed form collected straight from the beehive. Unlike commercial honey, raw honey is not heated or pasteurized, which preserves its beneficial enzymes, antioxidants, vitamins, and minerals. This golden elixir is rich in fructose, glucose, and water, making it a wholesome natural sweetener.
Home Remedy for Sore Throat and Cough
One of the most well-known uses of honey is soothing sore throats and coughs. Its antibacterial and anti-inflammatory properties help reduce throat irritation and ease coughing.
When combined with tea, the warm liquid helps to soothe the throat further, providing relief and comfort.
Antioxidant Powerhouse
Raw honey contains antioxidants like flavonoids, phenolic acids, and enzymes.
These compounds help protect our cells from oxidative stress and free radicals, which can lead to various diseases and premature aging.
When paired with tea, which is also rich in antioxidants, the duo creates a powerful synergy to combat oxidative damage.
Digestive Aid
Honey contains enzymes that can aid digestion. Raw honey has been known to help soothe an upset stomach and alleviate indigestion when combined with tea after a meal.
The antimicrobial properties of honey may assist in reducing harmful bacteria in the gut, promoting a healthy digestive system.
Immune System Support
Raw honey's natural antibacterial and antiviral properties can support a robust immune system. When consumed with tea regularly, the combination may help prevent infections and keep common ailments at bay.
Enhancing Nutrient Absorption
Tea, especially herbal teas, can contain various nutrients. Raw honey acts as a carrier that enhances the absorption of these nutrients, ensuring that your body maximizes the benefits of the tea's natural goodness.
Energy Boost
The natural sugars in raw honey, primarily fructose and glucose, provide a quick and sustainable energy boost. Combining raw honey with tea can be an excellent way to revitalize your energy levels during the day.
Choosing the Right Honey
Selecting high-quality raw honey to reap the full therapeutic benefits is crucial. Look for locally sourced, organic, and unprocessed honey whenever possible.
These are less likely to be adulterated and retain the maximum nutrients and enzymes beneficial for health.
Feel the Sweet Relief of Raw Honey in Tea
Incorporating raw honey into your daily tea ritual can provide many health benefits.
From soothing a sore throat to boosting your immune system, this sweet natural remedy is a treasure trove of therapeutic properties. Remember to choose raw honey for maximum benefits and pair it with your favourite tea to create a harmonious blend of taste and wellness.
So, the next time you brew a cup of tea, add a spoonful of Oneroot Honey and indulge in the sweet relief it brings to your body and soul.
5 Recipes of Unpasteurized Honey that Shows its Decadence
Welcome to Oneroot Honey, your go-to source for the best Canadian wildflower honey and other unpasteurized honey options.
If you're a food enthusiast looking to add natural sweetness to your recipes, you've come to the right place.
We’re delving into the wonderful world of unpasteurized honey and sharing some delectable recipes where it shines as a vital ingredient.
Prepare to embark on a culinary adventure and discover unpasteurized honey's numerous health benefits and exceptional flavours.
Health Benefits of Unpasteurized Honey in Recipes
Unpasteurized honey, or raw honey, undergoes minimal processing, allowing it to retain its natural enzymes, antioxidants, and nutrients.
Raw honey provides various health benefits, unlike most commercial honey, which is pasteurized and filtered. It possesses antimicrobial and anti-inflammatory properties that can promote overall well-being.
Incorporating unpasteurized honey into your recipes enhances the taste and adds a nutritional boost to your meals.
Sweet and Savoury Delights: Unpasteurized Honey Recipes for Every Palate
1. Honey Pesto Salmon Papillote:
Savour the delightful combination of honey and salmon in this easy-to-make recipe. The natural sweetness of unpasteurized honey enhances the flavours of the succulent salmon, creating a memorable dining experience.
2. Honey Roasted Vegetables:
Elevate the taste of roasted vegetables by drizzling them with a mixture of unpasteurized honey, olive oil, and a pinch of salt. The honey caramelizes during roasting, giving the veggies a delectable golden glaze.
3. Honey Walnut Granola:
Kick-start your mornings with a wholesome and nutritious breakfast by preparing homemade honey walnut granola. Rolled oats, nuts, seeds, and a generous drizzle of unpasteurized honey create a crunchy and satisfying morning treat.
Unpasteurized Honey Dessert Recipes to Satisfy Your Sweet Tooth
1. Honey Cinnamon Ice Cream:
Cool down on a warm day with homemade honey cinnamon ice cream. The unpasteurized honey and aromatic cinnamon create a rich and creamy treat that will satisfy your sweet cravings. Alternatively, try this Sea Salt and Honey Ice Cream recipe.
2. Power Up Vegetarian Protein Ball:
This little energy booster is super simple to make. Mix and match different ingredients to satisfy your sweet tooth. The Protein Ball recipe is here.
Tips for Cooking with Unpasteurized Honey
How to Substitute Unpasteurized Honey for Sugar:
Learn how to swap sugar with unpasteurized honey in your favourite recipes. Discover the proper conversion ratios and tips to ensure the best results in your baking and cooking.
Storing and Handling Unpasteurized Honey:
Unpasteurized honey requires proper storage to maintain its quality. Learn the best practices for storing and handling this natural treasure to preserve its flavours and beneficial properties.
Cooking with Honey: Dos and Don'ts:
Master the art of cooking with unpasteurized honey by following essential tips. Avoid burning or overcooking your dishes, and learn how different types of honey can enhance specific recipes.
Choosing the Right Type of Honey:
Explore the variety of unpasteurized honey available and which types work best for culinary applications. From Canadian blueberry honey to other specialty varieties, each brings its unique flavour profile.
Unpasteurized honey is a versatile and nutritious ingredient that can elevate the flavours of your recipes.
From sweet to savoury dishes and breakfast delights to decadent desserts, there's a world of culinary possibilities waiting to be explored with unpasteurized honey.
Remember to source your honey from reputable suppliers like Oneroot Honey to ensure high-quality and uncontaminated products.
Happy cooking, and enjoy your delightful creations!
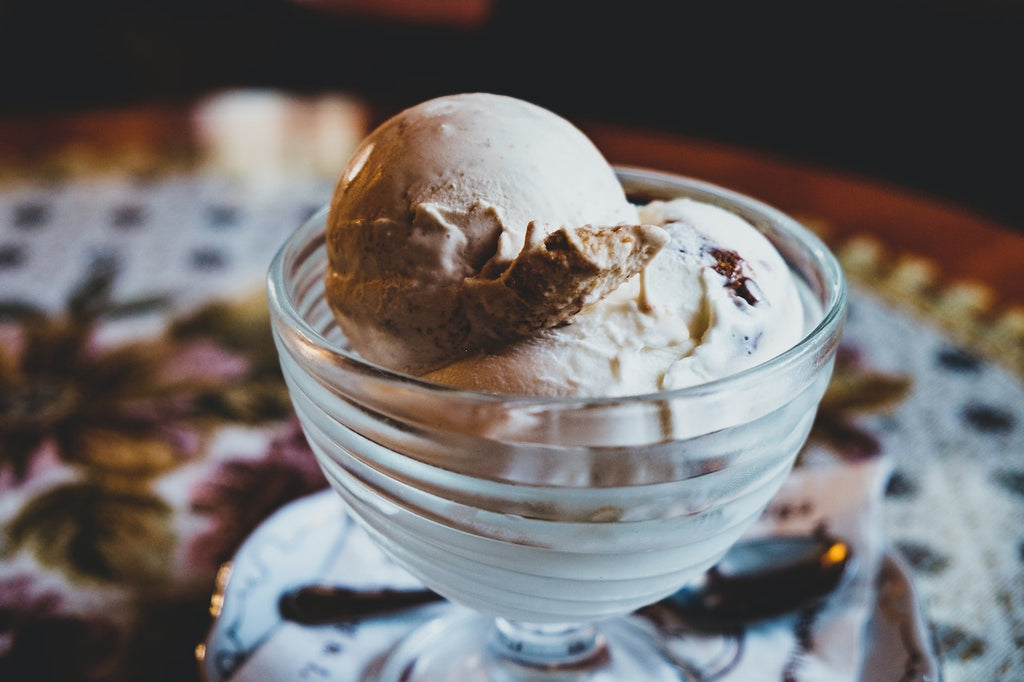
10 Delicious Tips for Making Better Ice Cream
Who doesn't love a scoop of creamy, delicious ice cream?
It's the ultimate comfort food that satisfies our sweet tooth.
But have you ever wondered how to make ice cream at home?
In this blog post, we've got you covered with ten tips for creating the perfect batch of homemade ice cream.
Tip 1: Use High-Quality Ingredients
Choose full-fat dairy products and premium flavourings such as pure vanilla extract for the best results.
Look for brands that use hormone-free milk from grass-fed cows for the richest flavour. Choose a heavy cream with a high-fat content for a smooth, creamy
texture.
As for other ice cream ingredients, fresh is always best. Use ripe fruits and sweeteners like organic honey or maple syrup instead of processed alternatives.
Tip 2: Experiment with Unique and Exciting Flavours
Add unexpected flavours like lavender or ginger for a unique twist when making ice cream at home.
Other delicious ice cream flavours include:
- Sea salt and honey
- Strawberry basil sorbet
- Lavender honey ice cream
Tip 3: Pay Attention to the Texture
When heating your mixture on the stove, keep an eye on the consistency and remove it from the stove once it reaches the right consistency.
Tip 4: Chill the Mix Before Churning
Put the mixture in the fridge for at least 4 hours or overnight before churning to ensure it is well chilled.
Tip 5: Use an Ice Cream Maker for Consistent Results
Pour your chilled mixture into an ice cream maker and let it do its magic.
Top Tip: Slow churning helps create a creamy, smooth texture instead of a grainy one.
After about 20-30 minutes of churning, transfer the mixture quickly into a container and place it in the freezer for further hardening if necessary.
Tip 6: Stir the Mix Regularly While Freezing
It's important to stir the mix regularly until it’s completely frozen.
This helps to prevent large ice crystals from forming, resulting in a smoother and creamier texture.
Tip 7: Add Mix-Ins at the Right Time
To evenly distribute mix-ins, such as fruit or chocolate chips, add them at the last minute of churning. This will ensure that your additions are evenly distributed throughout your ice cream without sinking or clumping together.
Tip 8: Store Ice Cream Properly for Optimal Texture
Ensure the container you choose to store your ice cream has an airtight lid. This will prevent any unwanted moisture from entering and ruining the texture.
Also, try not to keep opening and closing the container while it's in the freezer.
Every time you do this, warm air enters, which can cause ice crystals to form on top of your iced treat.
Tip 9: Get Creative with Toppings and Dessert Presentation
Add ice cream toppings like chopped nuts or crumbled cookies for extra crunch to your scoops.
Experiment with unique flavour combinations such as sea salt caramel or wildflower honey.
Tip 10: Try Making Healthy and Alternative Ice Creams
One popular alternative is using frozen bananas as the base for your ice cream.
Simply blend frozen bananas until they reach a creamy consistency and add any mix-ins or flavours.
Another alternative is coconut milk-based ice cream which offers a rich and creamy texture. Combine full-fat coconut milk, organic honey, and flavourings of your choice.
Enjoy the Perfect Scoop of Ice Cream!
You can elevate your dessert game by incorporating these simple techniques into your ice cream-making process.
And if you're a fan of organic ingredients, why not try the sweeteners from Oneroot?
We offer pesticide-free, antibiotic-free, organic honey and maple syrup from the pristine Canadian Wilds.
Contact us today to find the ultimate ice cream ingredients and toppings.
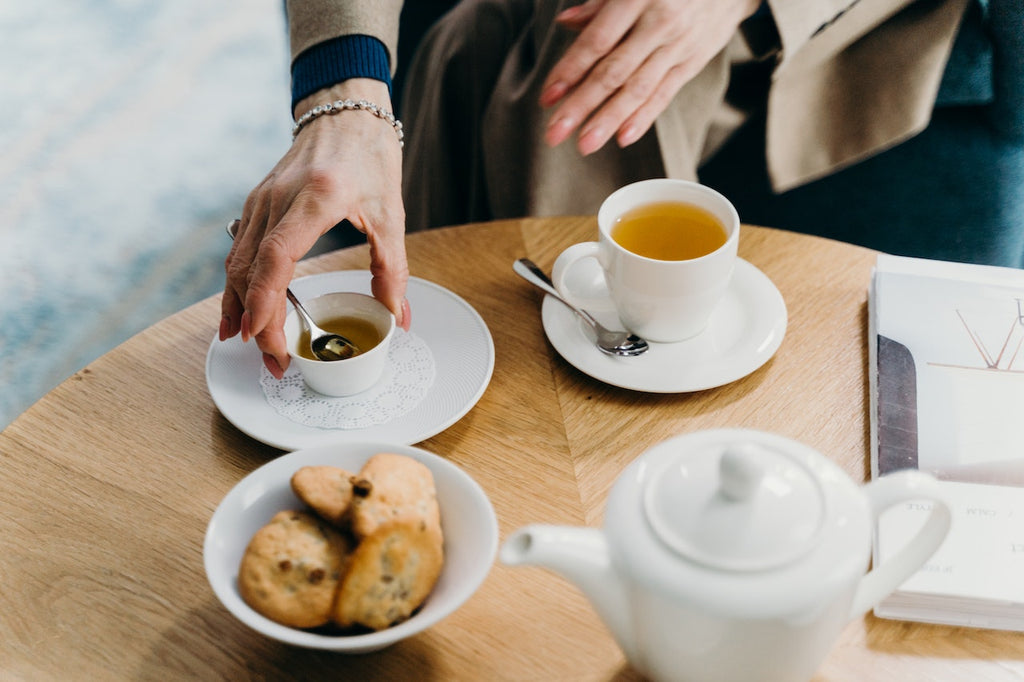
Everything You Need to Know About Honey in Coffee
Sweet or not, there's a debate stirring among coffee aficionados around the world – should you use honey in your cup of brew? Though it might seem like a small adjustment to your regular routine, honey can make a big difference in flavour and texture. In this blog, we'll explore both sides of the debate and investigate whether honey can be beneficial when added to coffee and why the buzz-worthy trend is taking the world of coffee by storm.
What is the debate about honey in coffee?
It's been around for quite some time. Some people swear by the benefits of honey in coffee, while others are not so sure.
Those favouring using honey in coffee argue that it can help sweeten the drink, without adding excessive calories. On the other hand, those who are against it argue that it can actually make the drink less healthy.
The pros and cons of adding honey to your coffee
Honey has been used as a sweetener for centuries, and it's no different when it comes to coffee. Before stirring honey into your morning cup of joe, here are a few things to consider.
The pros
Honey is a natural sweetener
Honey is a great option if you're looking for an alternative to refined sugar. Bees make it from the nectar of flowers, so it's completely natural. Honey also contains trace amounts of vitamins and minerals, which refined sugar does not.
Honey can add flavour to your coffee
In addition to sweetness, honey can also add its own unique flavour to your coffee. Depending on the type of honey you use, you might taste hints of floral or fruity notes in your cup. This can be a nice change from the usual coffee flavour profile.
Honey has health benefits
Honey has been shown to have several health benefits. It's full of antioxidants and has anti-inflammatory properties. It's also been shown to boost your immune system and help fight bacteria and viruses. Some studies have even suggested that honey may help boost cognitive performance and reduce stress levels.
Honey won't spike blood sugar levels
Honey is also much lower on the glycemic index than other sweeteners, meaning it won't cause spikes in your blood sugar levels.
The cons
Honey can be high in calories.
One tablespoon of honey contains about 64 calories, which is more than the same amount of sugar (48 calories). If you're watching your calorie intake, you may want to consider an alternative sweetener for your coffee. However, you can achieve the same level of sweetness with half the amount of honey compared to sugar.
Honey has a strong flavour
If you're not used to the taste of honey, it can be overwhelming when added to coffee. Some people find it too strong and prefer to use other sweeteners instead. Also, depending on the type of honey you use, it can overpower the flavour of your coffee beans.
Honey can make your coffee overly sweet
Because honey is so much sweeter than sugar, it can be easy to overdo it and end up with an overly sweet cup of coffee. To avoid this, start with just a small amount and adjust according to taste.
Allergies
Remember that honey contains pollen, which some people may be allergic to. If you're unsure about whether you can tolerate honey in coffee, it's always best to err on the side of caution and avoid it altogether. Do note that it is extremely rare to have allergic reactions to pollen in honey.
Contaminates
Honey may contain harmful substances (i.e. antibiotics, pesticides) that can contaminate your coffee. If you add honey to your coffee, ensure you only use high-quality honey from a trusted source.
How to use honey in coffee
When it comes to honey in coffee, there are a few different ways you can go about it. You can add honey to your coffee grounds before brewing, stir it into your brewed coffee, or even make a cold brew with honey.
- For the best results, use high-quality filter coffee and organic honey.
- Keep in mind that the honey will dissolve better if you add it while the coffee is hot.
- We find that lighter kinds of honey work best, since they don't alter the taste of the coffee as much.
- If you're adding honey to your coffee grounds before brewing, start by mixing the honey and grounds in a bowl. This will help the honey evenly distribute throughout the coffee. Then, brew your coffee as usual.
- If you're stirring honey into your brewed coffee, start with a small amount and add more to taste. A little goes a long way with this method!
- For cold brew coffee with honey, mix the honey and cold brew concentrate together in a jar or container. Then add water and ice as desired.
Final thoughts on honey in coffee
If you've been thinking about adding honey to your coffee, there's no better time than now to give it a try. Whether you're looking for a healthier alternative to sugar or just want to enjoy the unique honey flavour in your cup of joe, adding honey to your coffee is definitely worth a try!
Browse our store for exquisite honey and divine coffee.
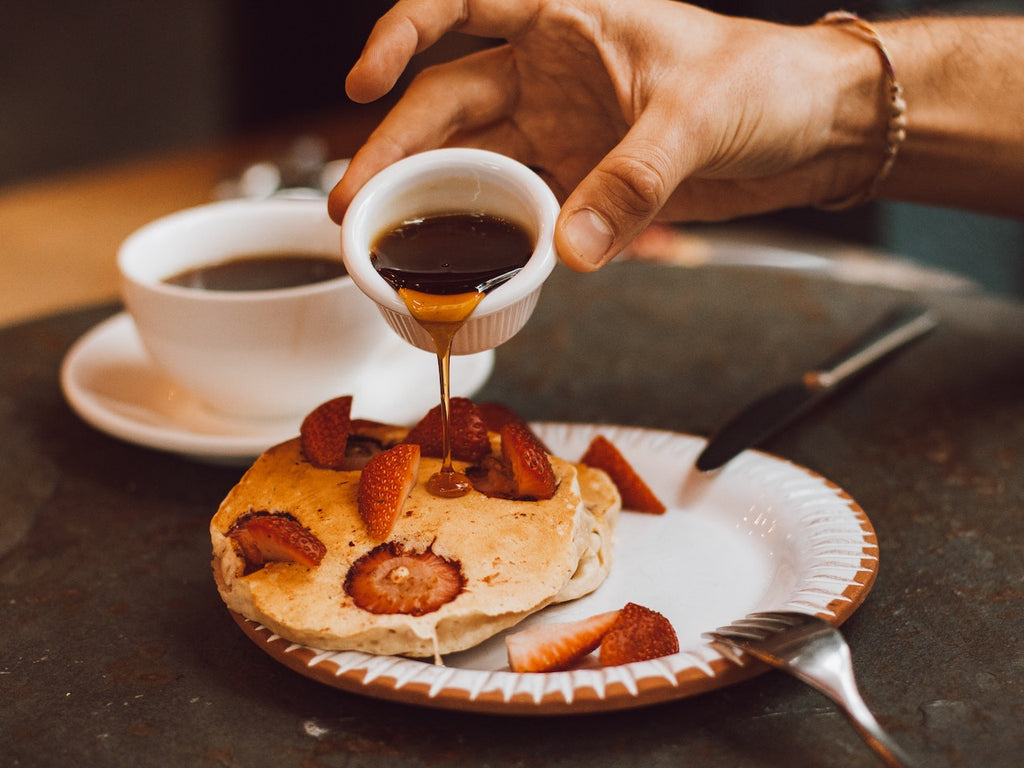
11 Healthy Maple Syrup Recipes
Want to eat healthier but just can't help craving the sweeter things in life? Let's face it; a sweetener is no substitute for sugar. It's time to get creative with your pantry ingredients, which means finding more nutritious alternatives. That's where maple syrup comes in; it's the ingredient you've been waiting for!
This versatile sweetness can be added to any of your traditional sweet treats as a sugar substitute, from baked goods to pancakes to, yes, even your morning oatmeal. But that's not all! Maple syrup is not exclusively the domain of desserts and sweet treats; you can make delicious savory dishes with this sweetener. Try, for example, a cold pasta salad with a maple syrup vinaigrette. Breakfast is made all the better by adding maple syrup – Test it out atop coconut pancakes! Ultimately, a sweet treat is a must-have now and then, but how to indulge without adding to your waistline? Healthy snacks are great in that case, such as these healthy maple oatmeal cookies.
In addition to tasting delicious and being an unrefined sugar, maple syrup is high in antioxidants, which can help boost your immune system. It's also a good source of manganese and zinc, essential for healthy bones and skin. And on top of that, maple syrup is an excellent option because it affects blood sugar levels less than other sweeteners.
If you'd like to enjoy your food with a touch of maple goodness without indulging too much, here are 11 healthy maple syrup recipes to try that we absolutely love.
Maple-Roasted Brussels Sprouts
Start by making the maple syrup glaze. Combine 1/2 cup pure maple syrup, 1 tablespoon minced shallot, 1 teaspoon lemon juice, and 2 teaspoons water in a small saucepan over medium heat. Bring to a boil and cook until thickened slightly, about 2 minutes. Remove from heat; set aside until ready to use.
Roast brussels sprouts until tender but still bright green and charred around the edges (about 40 minutes total).
Transfer Brussels sprouts to a large serving bowl or platter; drizzle with maple syrup glaze before serving.
Brussels sprouts have risen in popularity in recent years for a good reason. They are packed with vitamins and nutrients, including vitamin C and potassium. They also contain fiber, manganese, and a host of phytonutrients that may help reduce the risk of certain cancers.
This take on Brussels sprouts is sure to please even the pickiest eaters. The sweet glaze adds sweetness, while the charred edges give it some crunch. If you want to add some meat, sautéed bacon or ham would be delicious in this dish. This dish is sure to become a new family favorite!

Organic Maple Syrup
Maple Syrup Candied Walnuts
To make candied walnuts:
- Combine 1 cup maple syrup and 1 cup brown sugar in a saucepan.
- Bring to a boil over medium-high heat.
- Add 2 tablespoons butter and stir until melted.
Cool for 5 minutes, then add 10 cups of raw walnuts (1 pound). Stir until coated in syrup mixture and return to the stovetop over medium-high heat. Cook for 10-12 minutes or until the liquid has reduced by half and the nuts are glazed.
Allow cooling completely before storing in an airtight container at room temperature or in the refrigerator for up to 2 weeks. Candied Walnuts are perfect for salads, desserts, and snacks. Walnuts are rich in nutrients, including omega-3 fatty acids, protein, and antioxidants. Candied walnuts are easy to make at home with just a few ingredients.
Maple-Glazed Salmon
Heat 1/4 cup maple syrup in a small saucepan over medium heat to make maple-glazed salmon. Cook for 5 minutes or until the liquid has reduced by half and is syrupy.
Add oil to a large skillet over medium-high heat, then add salmon and cook for 2-3 minutes per side or until browned on both sides. Remember to season the salmon filets with salt and pepper before adding them to the pan. Transfer the salmon to plates, drizzle each plate with maple syrup before serving.
This salmon is best served with steamed broccoli and brown rice. Salmon is an excellent source of omega-3 fatty acids and vitamin D. The combination of salmon and broccoli is also a good source of protein, which can help you feel full longer after eating. Salmon is also one of the best foods to eat if you want to improve your cardiovascular health—it's rich in heart-healthy omega-3 fatty acids that may lower triglyceride levels.
French Toast with Maple Syrup
When making French toast, maple syrup is a great addition. The sweet flavor and enhanced texture make for a delicious dish everyone will love. If you're looking for ways to add sweetness to your food without adding sugar, maple syrup is an excellent choice. You can also use this sweetener in other dishes like pancakes or waffles!
Maple Glazed Carrots
Maple syrup is a sweetener packed with health benefits. It's lower on the glycemic index than table sugar, which means it won't spike your blood sugars like white or brown sugars. Maple syrup also contains some minerals, including zinc, manganese, and antioxidants—one reason why traditional cultures have used maple syrup for so long.
To make maple-glazed carrots, heat the oven to 400°F. Arrange carrots on a baking sheet and drizzle with olive oil, salt, and pepper. Remove from oven and drizzle with maple syrup! Roast for 20 minutes or until tender, flipping halfway through.
Besides being delicious, maple syrup makes a beautiful carrots glaze because of its sweetness and flavor! A few things taste better than roasted carrots with a slightly sweet glaze from the natural sugars in maple syrup or honey.
Cranberry Sauce with Orange and Maple Syrup
The sauce is a delicious alternative to sugar-laden cranberry sauces and is easy to make. Just combine 4 cups fresh cranberries and 1 cup orange juice in a saucepan over medium heat, then simmer until the berries start to pop.
Add 1 tablespoon maple syrup per cup of cranberry mixture, then continue cooking for another 5 minutes.
Remove from heat and cool for about 30 minutes before serving on top of turkey or ham (or just by itself!). If you want an extra tangy kick, add a pinch of salt before serving!
Roasted Sweet Potatoes with Pecans and Maple Syrup
Roasting sweet potatoes is an excellent way to prepare them; this recipe takes it up a notch! The maple syrup caramelizes in the oven, which gives it a slightly crunchy texture. To make this dish, heat the oven to 425°F. Line a baking sheet with parchment paper, then set aside. Cut the sweet potatoes into cubes (about 1/4-inch thick), toss them with 1 tablespoon of olive oil, and lay them on your prepared baking sheet.
Sprinkle them generously with salt and pepper, then roast until they start to brown (about 20 minutes). While the potatoes are roasting, prepare the maple syrup glaze; whisk together 2 tablespoons maple syrup, 1 teaspoon garlic powder, and 1/4 teaspoon cayenne pepper in a small bowl. Mix the chopped nuts and after 20 minutes, remove the sweet potatoes from the oven. Gently toss through the nut and maple syrup glaze and pop them back in the oven for about 5-10 minutes until the syrup is bubbly.
Ham with Brown Sugar and Maple Syrup Glaze
For this dish, start by drizzling 1 tablespoon of unsalted butter over a medium-sized skillet. Add 1/2 cup diced ham and cook until browned, about 3 minutes. Pour in 2 tablespoons of maple syrup, then reduce heat to low and simmer for approximately 5 minutes, stirring frequently. Remove from heat and serve with mashed potatoes and steamed green vegetables.
Easy Peanut Butter, Banana, & Honey Sandwiches
Peanut butter, banana, and honey sandwiches are a classic. But why not try maple syrup for extra flavor? Spread peanut butter on one slice of bread. Add a banana and drizzle with maple syrup. Sandwich together with another slice of bread.
Maple Granola
Maple granola is a great way to add flavor to your morning meal. Mix 1/4 cup maple syrup with 1/4 cup vegetable oil, then add in 2 cups rolled oats and 1 teaspoon cinnamon. Stir until well combined. Spread on a baking sheet and bake at 300°F for 30 minutes, stirring every 10 minutes. Let it cool before eating.
Apple Crisp with a Pecan Crumble Topping
Maple syrup is a natural sweetener and can be used in place of refined sugar. The sweet, caramel-like flavor of maple syrup lends itself to many recipes. In addition to pancakes, waffles, and oatmeal, it can also be used as an ingredient in cooking dishes such as this apple crisp with a pecan crumble topping.
To make this, you'll need 1/2 cup maple syrup, 1/2 teaspoon cinnamon, 2 large apples (such as Rome Beauty), peeled and diced, 1/8 teaspoon nutmeg, 1 teaspoon vanilla extract, 3 tablespoons cornstarch, and 1/2 cup water. Preheat oven to 350°F.
Mix maple syrup, cinnamon, nutmeg, and vanilla extract in a medium-sized bowl. In a separate bowl, combine the apples with the cornstarch and water until well mixed. Pour the apple mixture into an 8-inch square baking dish or equivalent oven-safe dish sprayed lightly with cooking spray. Set aside.
Pour the maple syrup mixture over the top of the apples. Sprinkle 1 cup of crumbled pecans. Bake for 45 minutes or until the apples are tender and bubbly around the edges. Remove from the oven and let cool slightly before serving.
This recipe is excellent if you want something sweet but not too indulgent.
Maple Syrup- the real MVP
Maple syrup is a brilliant way to add sweetness to your dish. Its versatility makes it an excellent sweetener substitute when you're looking to cut back on processed sugar but still want something delicious!
The best part about maple syrup is that it's easy to use. You can add it to your recipes as a sugar substitute or drizzle it on top of desserts for a spot of flavor. Or, take some inspiration from the divine recipes above and create your own mouth-watering dish.
What's next on your menu?

You Need To Try This Honey Glazed Ham This Thanksgiving
You Need To Try This Honey Glazed Ham This Thanksgiving
While ham is best known as a Christmas classic, it’s still a Thanksgiving favorite. If you’re looking for the perfect recipe for honey-glazed ham, you’re in the right place. Try this recipe.
Ingredients
- 1 (5-pound) ready-to-eat ham
- ¼ cup whole cloves
- ¼ cup dark corn syrup
- 2 cups honey
- ⅔ cup butter
Method
- Preheat oven to 325 degrees F (165 degrees C).
- Score ham, and stud with the whole cloves. Place ham in a foil-lined pan.
- Heat corn syrup, honey, and butter in the top half of a double boiler. Keep the glaze warm while baking the ham.
- Brush glaze over the ham, and bake for 1 hour and 15 minutes in the preheated oven. Baste ham every 10 to 15 minutes with the honey glaze. During the last 4 to 5 minutes of baking, turn on the broiler to caramelize the glaze. Remove from oven, and let sit a few minutes before serving.
What Should You Serve With Thanksgiving Ham
As expected, Thanksgiving ham goes well with the other dishes often served with turkey.
Your sugar-glazed ham pairs perfectly with traditional autumn sides like roasted Brussels sprouts or other vegetables, green beans (especially green bean casserole), baked squash (savoury with garlic and Parmesan or sweet with brown sugar and cinnamon), mashed potatoes (or mashed sweet potatoes), and cranberry sauce.
In certain cultures, the ham is decorated with pineapple slices that have cherries inserted into each hole. The pineapple juice will be reduced with brown sugar and spices to create a glaze.
Besides the dressing, a traditional turkey meal will be exactly the same (or stuffing). It's not possible to fill a ham the way you would a turkey. Many medical professionals advise avoiding baking the stuffing inside the turkey since it may result in undercooked filling and the spread of pathogens to the stuffing. That way, you won't have to give up your beloved dressing recipe (minus the giblets, unless you have some stashed in the freezer). A Southern-style cornbread dressing is one sort of dressing that pairs well with a Thanksgiving ham feast.
One Root is your source for premium raw honey. Explore our honey collection today to find the perfect addition to your Thanksgiving dinner.